


My wonderful mother, Sharon, taught me this pattern. It’s a quilt-as-you-go type technique that makes an orange-peel pattern. The resulting quilt will have a tactile, three dimensional feeling and scalloped edges.
Keep reading for full instructions on how to make this quilt.
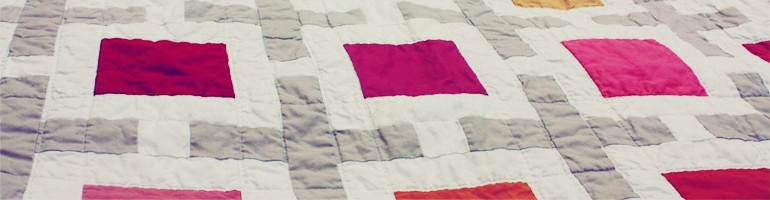
For this quilt, I’ll call “front” fabrics the ones that show up in the middle of the orange peel pattern. I’ll call “backing” fabrics the ones that show up when you fold over the curved edges, making the orange peel. In my quilt the front fabrics are purples and reds. The backing fabrics are black.
I call the circles pancakes.
Step 1: Make a stencil of a circle (Stencil 1), and make another of the circle cut in half (Stencil 2). This circle stencil does not include a seam-allowance, it will be the size of your finished circle. Use Stencil 2 to draw a perfect X onto Stencil 1. Connect the points of the X to create a square onto Stencil 1. This square is the size of the pieces of batting you will need for each pancake.

Step 2: Trace your circle, using Stencil 1, onto the back-side of your desired front fabrics. This is the line you are going to sew to make your circles. Hack out your fabric with no worries for cutting precisely, but allowing yourself at least a 1/4 inch seam allowance. Hack out the pieces for your backing fabrics allowing enough room for the circle and a 1/4 inch seam allowance to fit. (You don’t even have to trace the circle for your backing fabrics).

Step 3: Place the wrong sides together of your front and backing fabrics. Sew the pieces together following the line you traced on the front fabric. Sew the circle completely, you do not need to allow room to flip inside-out (explained in Step 5).
Step 4: Cut out the circle extremely close to the sewn line. This is done instead of clipping the curves so that the pancake will lie flat when you flip it right-side out.
Step 5: Pinch the front fabric, separating it from the back fabric. Ensuring that you are only going to cut the front fabric, snip a good size slip near-ish to the circle line. (Look back at the image of Stencil 1 to see where your slit needs to go).

This slit will allow you room to turn the pancake right-side out. It will also allow you room to jam a little square of batting inside the pancake (explained in Step 7).
Step 6: Turn the pancake right-side out through the slit and iron flat.
Step 7: Slide a square of batting inside the pancake through the slit. Use a pencil or something to ensure the batting is laying flat. Make sure that your slit is not being covered up by the batting.

Step 8: Using Stencil 2 or just using your fingers to feel for the corners of the batting square, sew an X through the circle. This is the quilting! Make sure that the ends of the X are aligned with the corners of the batting square.

Do this for all of your pancakes.
Step 9: Stack two pancakes on top of each other, backsides together. Line up the X’s on each pancake. Make sure you are being smart about where your slit is. You want it to be on a curve that gets folded over – not one that is being left as a border to the quilt. Sew the two pancakes together from one point of an X to a neighboring point.

Step 10: Open up the pancakes and iron flat the folded over curved edges. You can applique that edge down now, or later.

Step 11: When I made my quilt I liked to make pairs of 2 pancakes, and then join 2 pancakes to 2 other pancakes to make a 2 x 2 block of 4. Then you join a 2 x 2 block to another 2 x 2 block or however you like. I just made a small table topper, so I joined a 2 x 2 block to a 2 x 1 block resulting in a 2 x 3 block. Then I joined that to another 2 x 3 block and so on and so on.

I hope this was easy to understand and that you feel inspired! Post pictures, blog links, whatever! I’d love to see your work. Thank you!
** Do you have a lot of fabric scraps that are just a little too small for your circle pattern? I’ve made another little tutorial about how to make them work for this quilt.


Jenna’s clever. I DO want to be Jenna!
Hi Jenna, just wanted to mention that the circles need to be stacked with RIGHT sides together. Following your method, you will then reach inside the slit and put them right sides out. There is also an easier way to assemble this same quilt. Google ‘Fons and Porters quilt as you go circle/cathedral window’ or any combination of words that resemble this design. I’m trying to remember the steps…actually I’m going to try to make it in a few minutes…and then I’ll post the method. I do know that if you subscribe to Quilterstv.com, the Fons and Porter episode from their PBS show is available to watch. Also over on Quilt Out Loud. Anyway, just wanted to point this out. I love your colors that you chose.
Thanks Jonette!
Darleen – Thank you for mentioning the right sides together bit and for the tip on the Fond and Porters’ method!! I’m going to check it out. Have you tried it yet? Please link to your blog if you have one!
Fonz and Porter, not “Fond” …
I like how you say that the backing fabric can be “hacked out.” (Because I’m lazy.) But when I made a baby quilt like this a few months ago, I came up with an easy way for cutting BOTH pieces. I sew on a cabinet-mounted machine and used the old tape-and-thumbtack method for sewing circles. I was going to sew eight-inch circles, so I taped a thumbtack, point upward, four inches to the left of my needle. Cutting out squares of nine inches, I put them right sides together and squared up under the foot and pierced the middle of the square with the point-up thumbtack. I put the sewing foot down, then put my foot down . Voila – perfect eight-inch circle.
Tate – thanks for commenting! This method sounds genius! I do not have a cabinet mounted machine, but I bet I could rig something up. Do you have to worry about your presser foot pressure?
Oh I am glad I read the comments! I have two cabinet machines and want to make my first quilt with his method. You just saved me so much time!
This is just wonderful! Thank you for sharing how your mother taught you to sew-as-you-go Orange Peel!
Thanks, Maria!
The Fons and Porter pattern is called Peak-a-boo, and is in the Sept/.Oct 2006 issue. They use flannel and sew it along with the other fabrics – but this makes for bulky points.
I plan on making one of these for each of my boys. Any idea how big each circle was when you made this?
Hello Kara! I am not sure how big each circle was – I actually just traced a lid to a piece of tupperware! Unfortunately I no longer have the quilt with me, but no matter the size of the circles, you’ll be able to follow these basic instructions to make your project. Thanks!
ciao jenna!
ma se invece dovessi creare con questo sistema l esagono?
come potrei fare???
You can buy the stencils and ruler and book how to from Charlie it is called Less than Traditional. https://www.justnotions.com/less-than-traditional.html